
Using a virtual machine is a good way to test boot. This article will guide you how to boot from USB in VirtualBox virtual machine.
Introduction
Although there are many tutorials on how to boot from USB in VirtualBox, I still want to write this article for users on this site for reference.
VirtualBox is a free and lightweight virtualization software. It also supports the use of physical disks as virtual hard disks, which allows us to attach and boot physical disks in VirtualBox. So you can use it to boot the HDD, not just the USB.
You can create a virtual disk, it will point to the physical disk, and then attach it to the virtual machine manually. This allows you to keep using the disk on the real machine. However, the data written to this disk from the virtual machine will be lost. I was unable to copy the file too large, my virtual machine was stopped with an error message:
An error has occurred during virtual machine execution! The error details are shown below. You may try to correct the error and resume the virtual machine execution.

The I/O cache encountered an error while updating data in medium "ahci-0-0" (rc=VERR_ACCESS_DENIED). Make sure there is enough free space on the disk and that the disk is working properly. Operation can be resumed afterwards.

Error ID: BLKCACHE_IOERR
Severity: Non-Fatal Error
To overcome this problem, you can use the Virtual Machine USB Boot. This software will automatically create a virtual disk from the physical disk you want, then attach it to the virtual machine. The data written to this disk from the virtual machine will be saved, but the disk will be locked and you can not use it from the real machine. Currently, this software only supports Windows, you can not use it on Linux and macOS.
Please select a suitable method. VirtualBox does not currently support 32-bit UEFI boot, you can boot USB in VMware Workstation instead.
Boot from USB in VirtualBox
To boot the USB in VirtualBox, we will create a virtual disk pointing to the physical disk and then attach it to the virtual machine.
Create virtual disks from physical disks
To create a virtual disk from a physical disk, you first need to determine which physical disk you want to use. Ignore this step if you use the Virtual Machine USB Boot, which will automatically create this file.
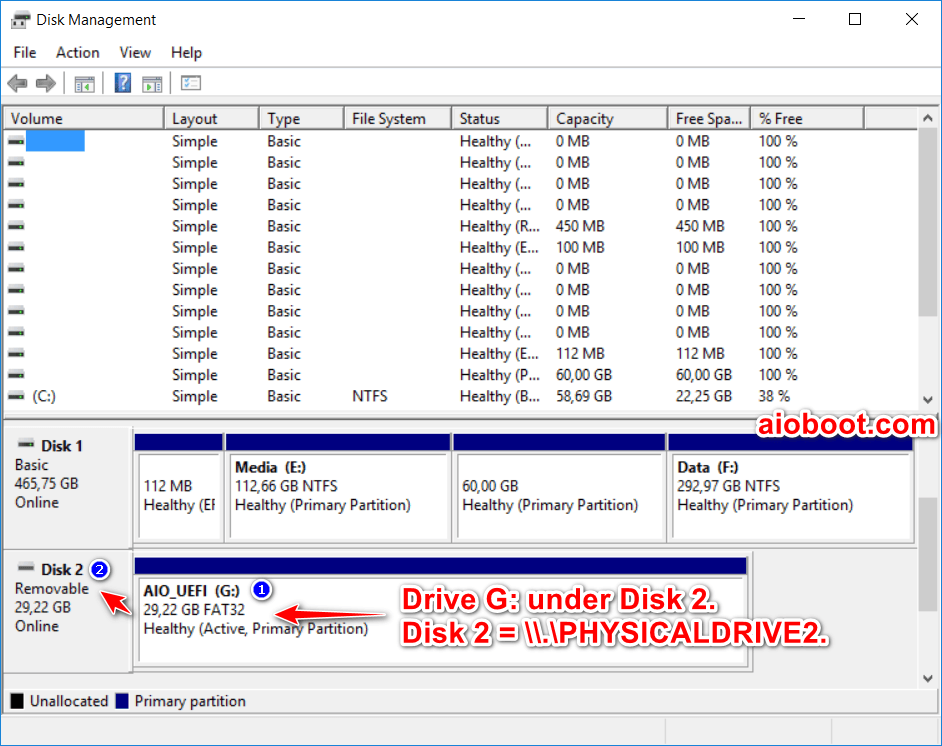
On Windows, you can use Disk Management to view all the disks on your computer. Here, I will use the G: drive where I installed the AIO Boot.
- Drive G: under Disk 2.
- Disk 2 is “\\.\PhysicalDrive2“.
Disk n is “\\.\PhysicalDriven“.
Run Command Prompt (Run as Administrator) and run the following command:
For VirtualBox 7 or later:
"%programfiles%\Oracle\VirtualBox\VBoxManage" createmedium disk --filename C:\Disk2.vmdk --format=VMDK --variant RawDisk --property RawDrive=\.\PhysicalDrive2
For older versions:
"%programfiles%\Oracle\VirtualBox\VBoxManage" internalcommands createrawvmdk -filename "C:\Disk2.vmdk" -rawdisk \\.\PhysicalDrive2
In the above command, I will create a virtual disk stored in C:\Disk2.vmdk for the physical disk 2. You need to change the information highlighted in red above to suit you. The output is as follows, which means success.
RAW host disk access VMDK file C:\Disk2.vmdk created successfully.
On Ubuntu and Linux distributions, you can use the sudo fdisk -l command to view the list of disks.
sudo fdisk -l
VBoxManage internalcommands createrawvmdk -filename "/path/to/Disk2.vmdk" -rawdisk /dev/sdX
On macOS, use the diskutil list command:
diskutil list
VBoxManage internalcommands createrawvmdk -filename "/path/to/Disk2.vmdk" -rawdisk /dev/diskX
Create a new virtual machine
Now we will create a new virtual machine and add the virtual disk created above. You can also add it to an existing virtual machine.
- For Windows, run VirtualBox under Administrator (on Linux and macOS as root).
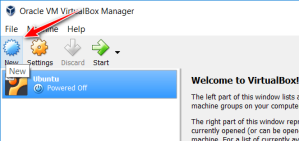
- Click the New button to create a new virtual machine.
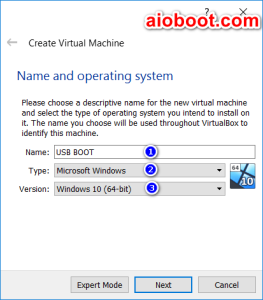
- Name and select the operating system for the virtual machine. Click Next.
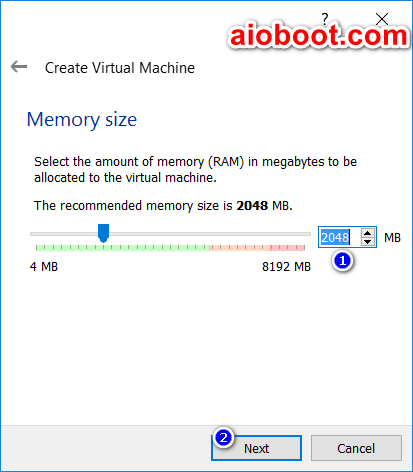
- Enter the memory size in the Memory size window. Click Next.

- In the Hard disk window, select Use an existing virtual hard drive file, then click the up arrow to select the .vmdk file created in the previous step. If you use Virtual Machine USB Boot, select Do not add a virtual hard disk, this software will automatically help you create and add virtual disk.
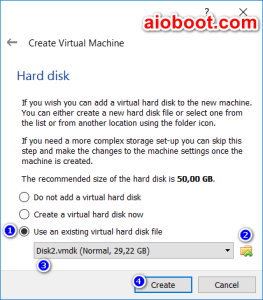
- Click the Create button to finish.


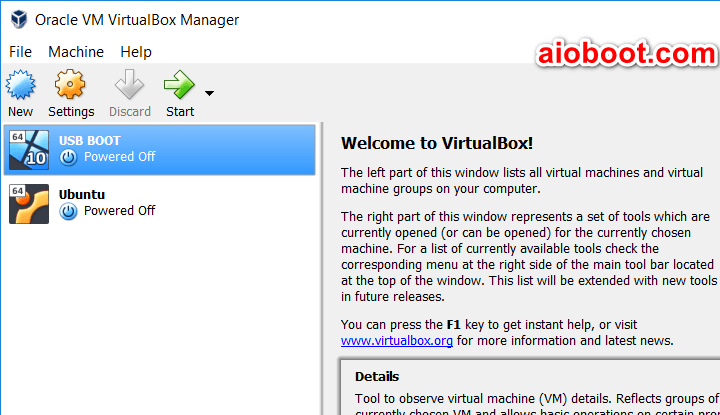
Now just select the virtual machine in the list, click Start to boot from USB in VirtualBox. If you want to boot UEFI in VirtualBox then go to Setting > System and check the Enable EFI (special OSes only) check box.
Virtual Machine USB Boot
Using Virtual Machine USB Boot will support writing data to physical disk from virtual machine. It will automatically create the virtual disk file and attach it to Port 0. It also supports QEMU.
- Download Virtual Machine USB Boot. I will download the Portable version to avoid having to install.
- Extract the .zip file and run the .exe file.
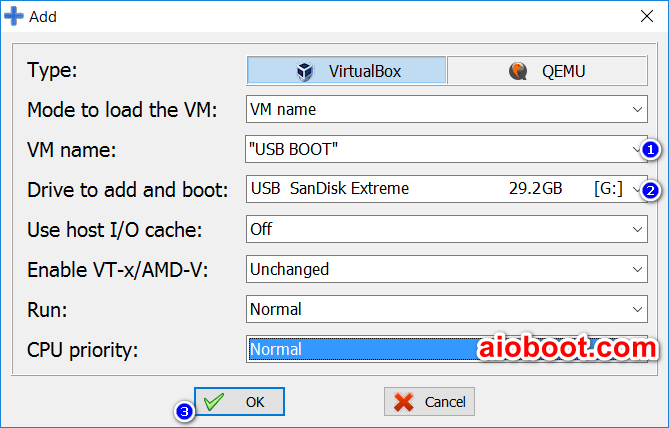
- Click Add to add the VirtualBox virtual machine you created above.
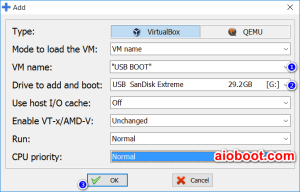
- Type: VirtualBox.
- Mode to load VM: VM name.
- VM name: Name the virtual machine you created above.
- Drive to add and boot: Select the hard disk you want the program to create virtual disk and attach it to boot. If you have created the virtual disk from this physical disk and attached it to the virtual machine, remove it first. Open VirtualBox, select the virtual machine name and click the Settings button, from the Storage section, right-click on the .vmdk file name and select Remove Attachment.
- Set the remaining items and click OK to finish.
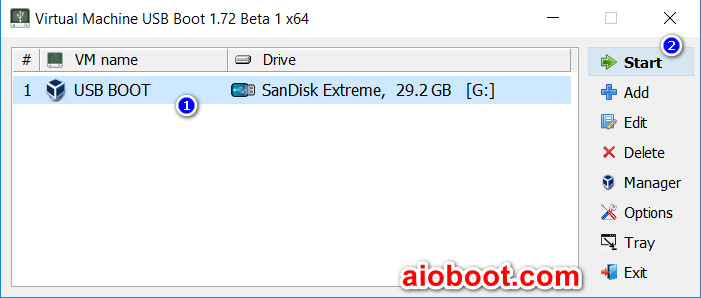
Select the virtual machine, click Start, Virtual Machine USB Boot will automatically lock the hard disk of your choice and boot it.
Using virtual machines helps us to test beforehand without having to reboot the computer. This is great, right? Good luck!
thank you the commands work under linux mnt 19.3 in december 2020. the rest is easily worked out with virtual box, not necesary to instal the usb virtual box program in my case. i just created a VDI to install once boot from VMDK (set as primary disk on VB)
Failed to open image ‘C:\usb.vmdk’ for writing due to wrong permissions (VERR_VD_IMAGE_READ_ONLY