
Clover Bootloader supports booting EFI files. This article will guide how to boot Ubuntu and Linux Mint ISO from Clover Bootloader.
Overview: Clover Bootloader supports booting EFI files, in this article, I will add the Grub2 EFI file (grubx64.efi) to Clover Bootloader. Then I will configure Grub2 to boot Ubuntu and Linux Mint directly from the ISO file without having to select the menu. In addition, I will guide how to configure Grub2 to boot the operating system installed on your drive. This way, you can dual boot Hackintosh, Windows, Ubuntu and many other Linux operating systems from Clover. First, install Clover Bootloader if you have not already.

Add Grub2 to Clover Bootloader
AIO Boot users will see two Grub2 icons and rEFInd to boot them from Clover. Here’s how I did it.
You can add Grub2 to Clover Bootloader by modifying its configuration file (\EFI\CLOVER\config.plist). Open the config.plist file and look for the following lines:
<key>GUI</key>
<dict>
	<key>#ConsoleMode</key>
	<string>0</string>
	<key>Custom</key>
	<dict>
		<key>Entries</key>
		<array>
Remove the # sign in the following lines if it contains:
<key>#Custom</key>
<key>#Entries</key>
Add Grub2 to Clover Bootloader by adding the following lines below the lines shown above:
<key>GUI</key>
<dict>
<key>#ConsoleMode</key>
<string>0</string>
<key>Custom</key>
<dict>
<key>Entries</key>
<array>
<dict>
<key>Disabled</key>
<false/>
<key>Hidden</key>
<false/>
<key>Hotkey</key>
<string>G</string>
<key>InjectKexts</key>
<false/>
<key>NoCaches</key>
<false/>
<key>Path</key>
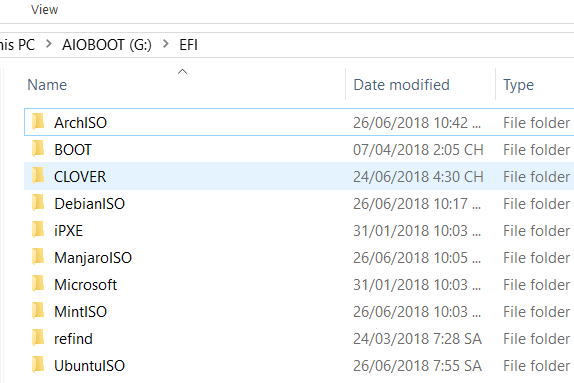
<string>\EFI\UbuntuISO\grubx64.efi</string>
<key>Title</key>
<string>Ubuntu ISO</string>
<key>Type</key>
<string>Linux</string>
</dict>Add rEFInd to Clover Bootloader, rEFInd automatically detects Clover but Clover does not. To install rEFInd, just download the refind-bin-xx.YY.zz.zip file and extract the refind directory to the EFI directory on your drive. Place the refind directory peer to the CLOVER directory and in this directory contains the refind_x64.efi, refind_ia32.efi, and refind_aa64.efi files.
<dict>
	<key>Disabled</key>
	<false/>
	<key>Hidden</key>
	<false/>
	<key>Hotkey</key>
	<string>R</string>
	<key>InjectKexts</key>
	<false/>
	<key>NoCaches</key>
	<false/>
	<key>Path</key>
	<string>\EFI\refind\refind_x64.efi</string>
	<key>Title</key>
	<string>rEFInd</string>
	<key>Type</key>
	<string>Linux</string>
	<key>Image</key>
	<string>\EFI\refind\icons\os_refind.png</string>
</dict>
By adding such entries, you can add a lot of EFI files without having to enter its path in the UEFI Shell.
- See more about Custom Entries at Clover Wiki.
- Clover Bootloader has the ability to emulate UEFI, you can boot EFI files even if you are using Clover Legacy.
- Correct your EFI file path (the value of Path).
- You can customize the icon (the value of Image). In the entry of rEFInd, I use its icon directly at the path \EFI\refind\icons\os_refind.png. Maybe your Clover theme will have the icons you need.
- You can place the files on any drive, if you want to specify a specific drive, declare the Volume key.
- You can also add Clover Bootloader to Grub2.
Boot Ubuntu and Linux Mint from Clover
Once you’ve added Grub2 to Clover, now you just have to configure Grub2 to boot directly into Ubuntu and Linux Mint.
I have compiled a grubx64.efi file that you can download here. Clover no longer develops 32-bit versions, so here I only use Grub2 EFI 64-bit to boot the 64-bit operating system.
Next, place the file grubx64.efi in a path, which you can copy to multiple files and place each file in a separate directory. Creates a configuration file for the file grubx64.efi, which is named grub.cfg and is located in the same directory as the file grubx64.efi. Then open the grub.cfg file (included in the download) and add the code you want.
Boot Ubuntu and Linux Mint from the ISO file:
function load_video {
  if [ x$feature_all_video_module = xy ]; then
    insmod all_video
  else
    insmod efi_gop
    insmod efi_uga
    insmod ieee1275_fb
    insmod vbe
    insmod vga
    insmod video_bochs
    insmod video_cirrus
  fi
}
set gfxmode=1024x768x32,1024x768x24,1024x768x16,1024x768,auto
set gfxpayload=keep
load_video
insmod gfxterm
terminal_output gfxterm

set timeout=0
menuentry "Linux ISO" {
	set iso_path="/EFI/UbuntuISO/ubuntu-18.04-desktop-amd64.iso"
	export iso_path
	search -s root -f ${iso_path}
	loopback loop ${iso_path}
	set root=loop
	set prefix=(loop)/boot/grub
	configfile /boot/grub/loopback.cfg
}
Here, I created the /EFI/UbuntuISO directory and copied all three grubx64.efi, grub.cfg and ubuntu-18.04-desktop-amd64.iso files to this folder. You can use the Grub2 code above to boot Ubuntu, Linux Mint from the ISO file, which also supports most ISO files of Ubuntu-based Linux distributions such as elementary OS… Just copy the ISO file into the path (on any drive) you want, then modify the path of the file in the above code. set timeout=0, Grub2 will automatically boot the first menu, if you have more than one menu to choose from, you can delete this line or increase its value.
Boot Manjaro from ISO file:
set timeout=0
menuentry "Manjaro ISO" {
	set iso_path="/EFI/ManjaroISO/manjaro-xfce-17.1.6-stable-x86_64.iso"
	export iso_path
	search -s root -f ${iso_path}
	probe -u -s rootuuid $root
	export rootuuid
	loopback loop ${iso_path}
	set root=loop
	set prefix=(loop)/boot/grub
	configfile /boot/grub/loopback.cfg
}
Debian Live:
set timeout=0
menuentry "Debian ISO" {
	set iso_path="/EFI/DebianISO/debian-live-9.4.0-amd64-xfce.iso"
	export iso_path
	search -s root -f ${iso_path}
	loopback loop ${iso_path}
	set root=loop
	configfile /boot/grub/grub.cfg
}
Arch Linux 64-bit:
set timeout=0
menuentry "Arch Linux ISO" {
	set iso_path="/EFI/ArchISO/archlinux-2017.09.01-x86_64.iso"
	search -s root -f ${iso_path}
	loopback loop ${iso_path}
	probe -u -s rootuuid $root
	linux	(loop)/arch/boot/x86_64/vmlinuz img_dev=/dev/disk/by-uuid/${rootuuid} img_loop=${iso_path}
	initrd	(loop)/arch/boot/intel_ucode.img (loop)/arch/boot/x86_64/archiso.img
}
Here are some Grub2 scripts that help you boot Linux from an ISO file. In addition, GParted and Clonezilla are also supported, you can find more code in the menuoff directory of AIO Boot.
Boot Ubuntu and Linux Mint installed on your hard drive
Clover Bootloader will automatically detect .efi files of operating systems installed on your hard drive including Windows, Android, Ubuntu, Linux Mint and other Linux distributions. If you know the path of this file, just add it to Clover as instructed above.
But if you install the operating system in Legacy mode, no .efi file will be created. If the operating system uses Grub2 as the bootloader, it will create a configuration file, usually located in /boot/grub/grub.cfg. You can use this Grub2 script to load the configuration file of that operating system.
set timeout=0
menuentry "My OS" {
	search --no-floppy --fs-uuid --set=root 44d0133a-f938-4ccd-ad06-26ba3d2bf870
	configfile /boot/grub/grub.cfg
}
44d0133a-f938-4ccd-ad06-26ba3d2bf870 is the UUID of the partition containing the file /boot/grub/grub.cfg, on Linux you can use the sudo blkid command to get this information, then replace it.
Alternatively, you can place the grubx64.efi file in the same directory as the grub.cfg file on the Linux partition. Or copy the grub.cfg file on the Linux partition to the same directory as the grubx64.efi file, but the kernel file name and code may change after each update, so the grub.cfg file should be updated.
With the simple steps above, you can boot Ubuntu from Clover, boot Linux from Clover and many other operating systems that Grub2 supports. Leave a comment below if you don’t know how to get the Grub2 code for your operating system. Good luck!
My friend, please compile the x86 version of grubx32.efi, I use this crutch with the rEFInd bootloader, send me musicstashall@gmail.com. I would really appreciate it.
Well, tried this but got MacOS stuck at “End Randomseed”…
This post is really amazing and useful, the instruction which is described above. but when I tried bot ubuntu software it shows an error https://itunessupport.org/blog/fix-error-54-itunes/ but after update ubuntu software I can easily boot my software.