
If you use plpbt.iso, you can only boot USB in Legacy BIOS mode. This article will guide you to boot from USB in VMware Workstation in UEFI mode. I’m not sure if previous versions could use a physical disk as a virtual disk in VMware. But with VMware Workstation 15, 14, you can do that. This release also provides the Secure Boot feature which I will use it to guide you on how to boot Grub2 with Secure Boot enabled.
Booting from USB in VMware Workstation is easy, but while booting, your USB will be locked and you can not use it. Unlike boot from USB in VirtualBox, VMware allows you to write data to USB. All data read and written to USB during boot will be saved.
We will go through two simple steps:
Create a new virtual machine
You can easily create new VMs in VMware Workstation through the steps below. Ignore if you already know how to create.
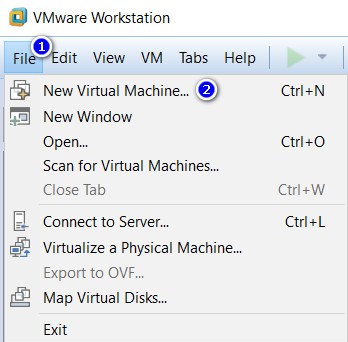
- Click File, select New Virtual Machine…
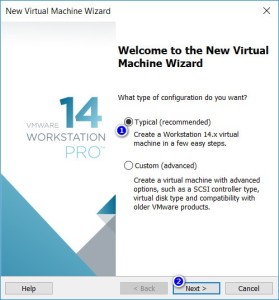
- Select Typical (recommended) and click Next.
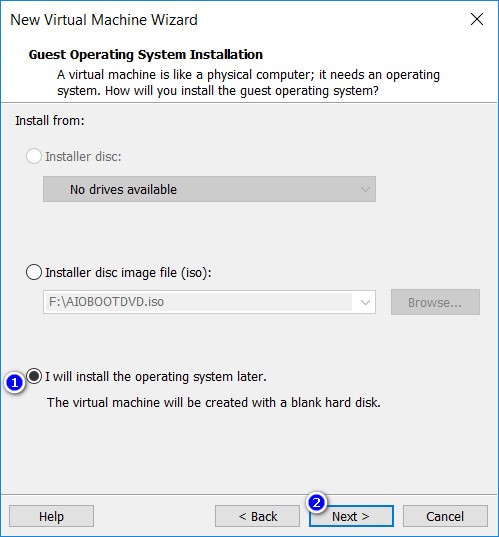
- Select I will install the operating system later. and click Next.

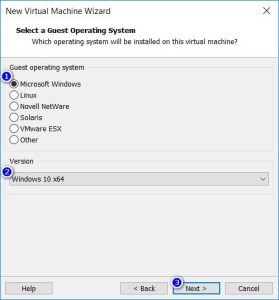
- In the Guest operating system and Version, select the appropriate item for you. Here I choose Windows 10 x64.
- Next at the Name the Virtual Machine window, select the Virtual Machine Name and Location and click Next to continue. I will keep the default.
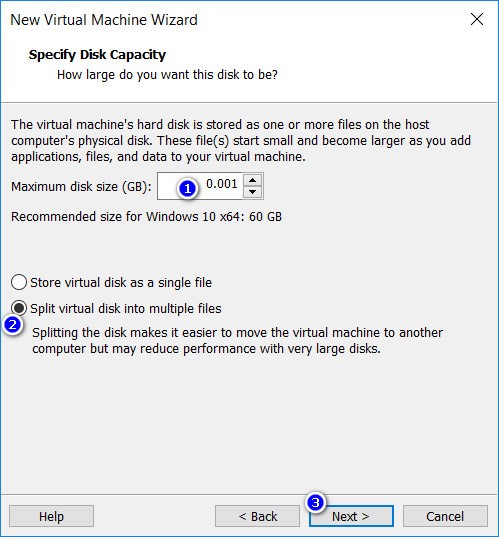
- In the Specify Disk Capacity window, enter the maximum size for the virtual hard disk you want to create. I will enter the smallest size is 0.001 because I will not use it.

- Click Finish, you now have a new virtual machine.


Add USB to virtual machine
After we create a new virtual machine, we will now add USB as the VMware Virtual Hard Disk.
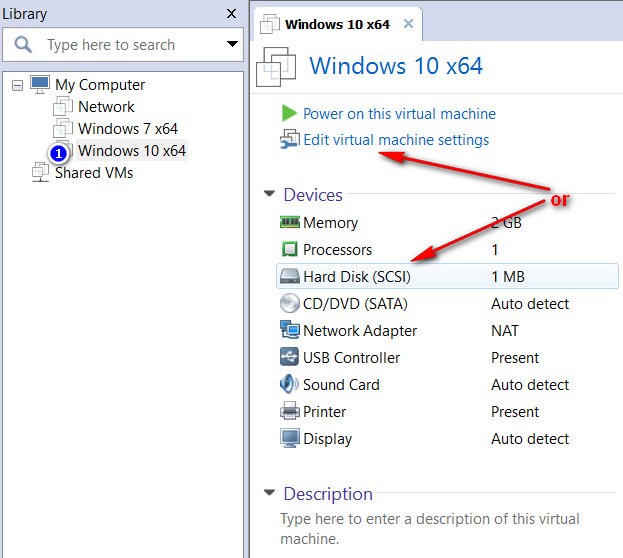
- Select the virtual machine name in the left pane, then select Edit virtual machine settings.

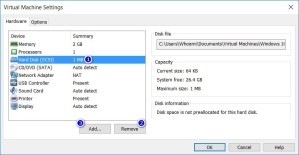
- In the Virtual Machine Settings window, if you do not use the virtual disk you created earlier, you can select it and click the Remove button to delete it.
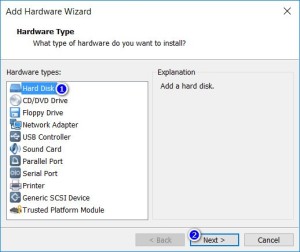
- Click the Add… button, under Hardware types, select Hard Disk to add a new Hard Disk. Click Next.
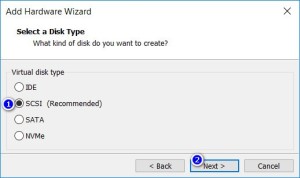
- Select SCSI (Recommended) as recommended by VMware and click Next. You can select another item that is suitable for your use.
- In the Select a Disk window, select Use a physical disk (for advanced users) and click Next.
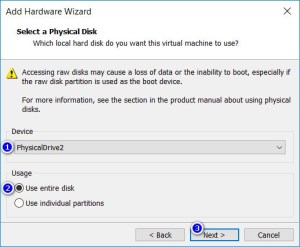
- In the Select a Physical Disk window, select your physical disk in the Device, it can be USB or HDD. Select Use entire disk in the Usage section to use Disk whole (all partitions on disk) or Use individual partitions to select the partitions you want. Click Next to continue.
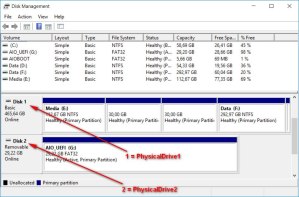
How to identify the physical disk name in the Device section? Just open Disk Management and see the corresponding disk number.
- In the Specify Disk File window, select the name and location where you want to save the disk file. Click Finish to finish, click OK to close the Virtual Machine Settings window.


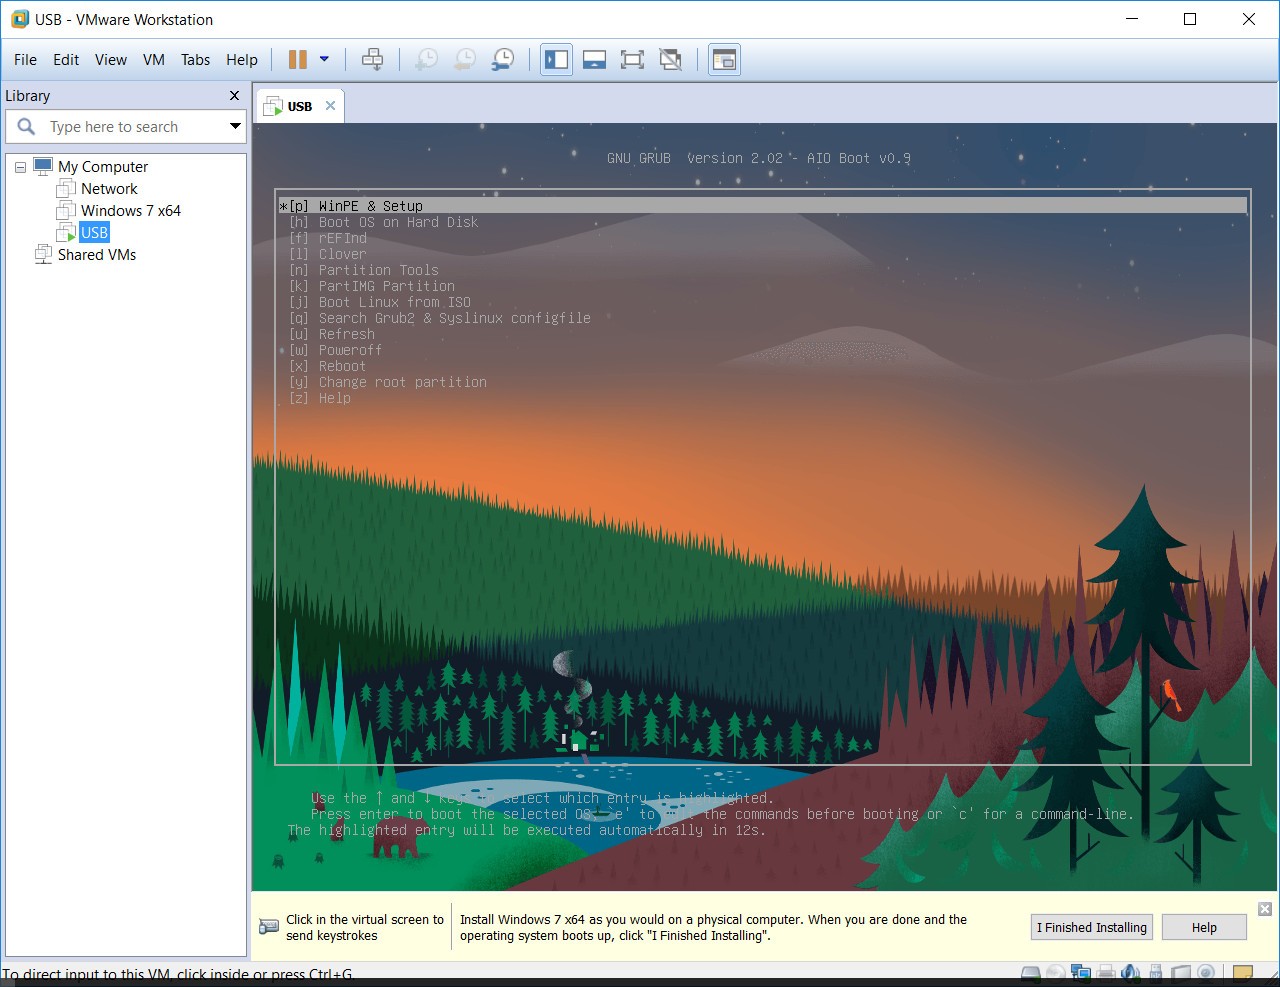
Ok now you can boot from USB in VMware Workstation by click the Power on this virtual machine button.
If you encounter this error, just quit all applications running on this disk and are using this disk.
One of the disks in this virtual machine is already in use by a virtual machine or snapshot.
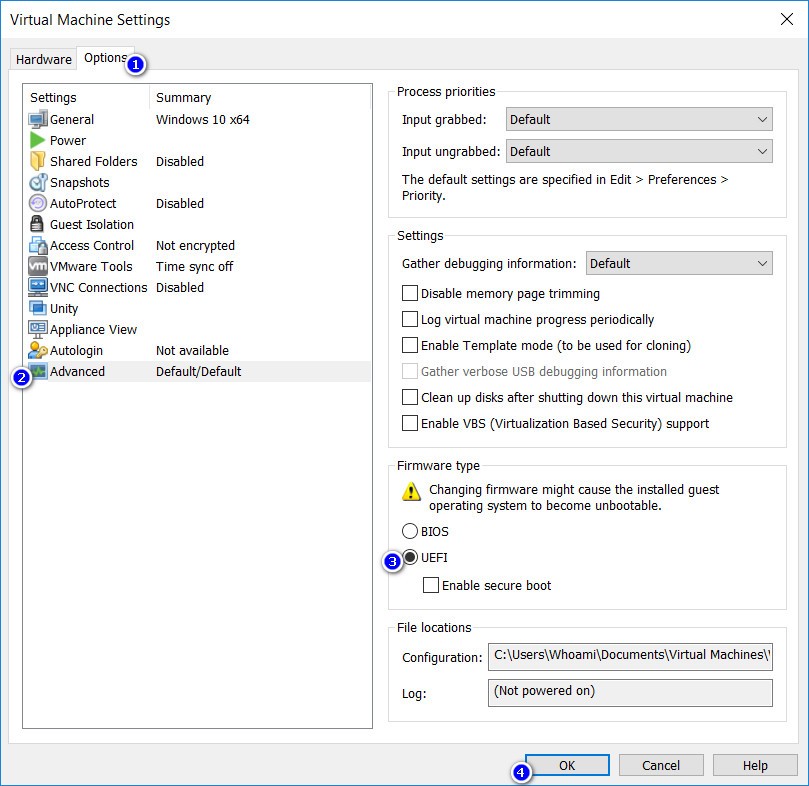
You can choose to use UEFI or BIOS mode in Virtual Machine Settings. Select Enable secure boot to enable Secure Boot.
Thank You
Important: USB emulation in the VM must be set to 3.0.
It will not work if set to 2.0
I LOVE YOU – YOU ROCK – TOTALLY BRILLIANT – I wish I was smart enough to think of that, and I wish the VMware folks were too!
Slick, no need for third parts software or tools anymore. Nice.
Excellent! I was able to restore an Acronis image into a new Windows 10 VM with no issues.