
Unlike dd or Win32 Disk Imager, this article will guide you how to create FreeBSD bootable USB from Windows without data loss.
What is FreeBSD?
FreeBSD is a free and open-source Unix-like operating system descended from Research Unix via the Berkeley Software Distribution (BSD). Although for legal reasons FreeBSD cannot use the Unix trademark, it is a direct descendant of BSD, which was historically also called “BSD Unix” or “Berkeley Unix”. The first version of FreeBSD was released in 1993, and today FreeBSD is the most widely used open-source BSD distribution, accounting for more than three-quarters of all installed systems running open-source BSD derivatives.
See more at Wikipedia.
Create FreeBSD bootable USB
AIO Boot supports booting all in one USB, including FreeBSD. And with the help of the Partition Image Mapper tool, you can boot many other operating systems. This tool allows you to temporarily use the partition image file as a real partition. The great thing is that FreeBSD also provides a partition image. You can then restore the partition as before without losing data.
This method supports booting FreeBSD in both Legacy and UEFI modes.
For FreeBSD, TrueOS, PC-BSD and FreeBSD-based operating systems, you can easily create a USB installer using the following steps:
- Download and install AIO Boot for USB.
- Download FreeBSD as an image of USB (XYZ-memstick.img).
- Open the file you downloaded above with 7-Zip.
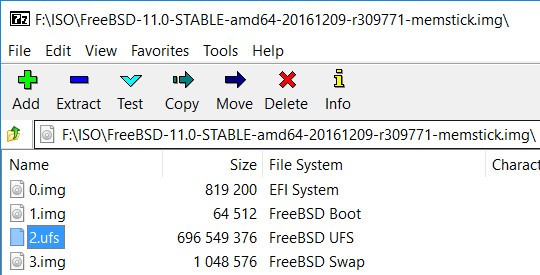
- Extract the 2.ufs file into the /AIO/Files/PartIMG folder on the AIO Boot drive. Depending on the version in which the file name may be different, you need to extract the largest file. You can rename this file for ease of remembering.
- Now you need to copy PartIMGMapper.exe to another drive. Because this application does not allow to run on the destination drive.
- Run PartIMGMapper.exe:
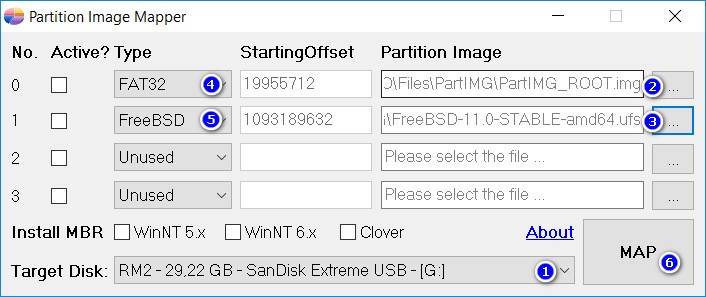
- Select /AIO/Files/PartIMG/PartIMG_ROOT.img in row 1. Because we will use Grub2 to boot into FreeBSD.
- Select the /AIO/Files/PartIMG/2.ufs that you extracted above in row 2.
- Click MAP button.
- The tool will back up the partition table information for later restoration. The file has .MBR extension in the same directory as PartIMGMapper.exe.
- Once used, run PartIMGMapper.exe, click UNMAP and select the previously backed up MBR file. All data and partitions will be restored as before.
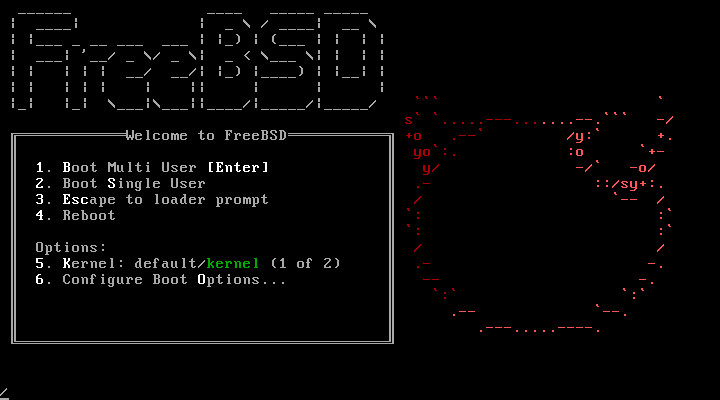
- Boot into USB, then boot FreeBSD from the PartIMG Partition menu (press the k key for quick access).
PartIMG Mapper
PartIMG Mapper has the same features as Partition Image Mapper, but it runs directly on Grub2 and Grub4dos without Windows.
FreeBSD do not allow overlapping partitions. This means that the beginning of this partition is part of another partition. To fix this, just delete the partition where you are putting the 2.ufs file above.
- Access the PartIMA Mapper menu, then MAP the PartIMG_ROOT.img and 2.ufs files. You will now have two new partitions.
- Access the Change root partition menu, then select the PARTIMGROOT partition as the root partition. Then access the Partition Tools menu and Backup MBR.
- Access the Change root partition menu, then select the PARTIMGROOT partition as the root partition. Then access the Partition Tools menu, select the AIOBOOT partition where you placed the two files, and then select Delete to delete the partition.
- You can now boot FreeBSD from the PartIMG Partition menu.
- Once you have installed FreeBSD, you can restore the deleted partition. Access the Partition Tools menu and select Restore MBR. Now from the AIO Boot partition, delete the two new partitions that you have MAP in step 1.
Good luck!
How do I integrate the install boot only ISO?, for example: `FreeBSD-12.0-RELEASE-amd64-bootonly.iso`.
FreeBSD 12.0-RELEASE does not have a `.fs` files, only `.img`. Choosing the lareg `1.img` files does not create a bootable FreeBSD disk.