
Many users have asked me how to add Ubuntu Server, this article will guide how to make a bootable USB to install Kali Linux, Ubuntu Server, Debian. By using Partition Image Mapper, you can boot and install most Linux and Windows operating systems without losing data.
Why?
With AIO Boot, you can run Kali Linux, Ubuntu, Debian and many other Linux distributions from USB. But only the Live versions are supported, the Kali Linux, Ubuntu Server and Debian installer work the other way, making AIO Boot impossible to put all of them on same USB drive. I don’t know how to customize the path to set the directory containing the installation files (or this is not supported). Many Linux distributions are based on a Linux distribution, such as Kali Linux is based on Debian, Lubuntu is based on Ubuntu… They have the same directory structure, which is why AIO Boot can not put them on the same drive.
If you integrate Ubuntu Server with AIO Boot, you have the following problem:
Detect and mount CD-ROM
No common CD-ROM drive was detected
With Partition Image Mapper, you can easily make a bootable USB to install Kali Linux, Ubuntu Server, Debian and many other operating systems.
Partition Image Mapper
Partition Image Mapper is a tool that allows you to temporarily use ISO files and partition images as a real partition, it supports Windows XP, Windows 7, 8 and Windows 10. PartIMG Mapper has the same features as Partition Image Mapper but it runs directly on Grub2 and Grub4dos. You should read more about this software to know how to use it.
Partition Image Mapper only supports USB, and it seems that these distributions do not work on fixed hard disks. Also, it will not work if you boot USB on the virtual machine, try on the real machine.
Here are the steps to make a Kali Linux bootable USB using Partition Image Mapper, for Ubuntu Server, Debian and other operating systems, just replace the ISO file:
- Install AIO Boot.
- Copy the Kali Linux ISO file and other ISO files to the AIO Boot drive.
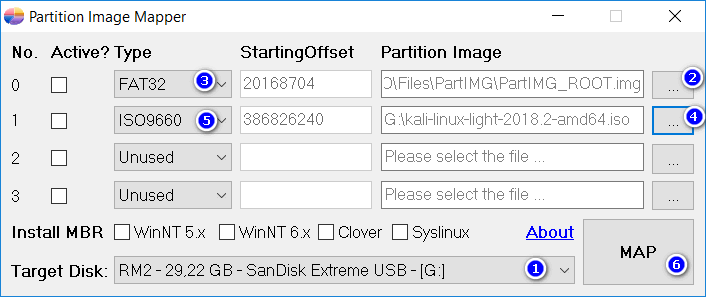
- Copy the PartIMGMapper.exe file to another drive, and then run it.
- Select the \AIO\Files\PartIMG\PartIMG_ROOT.img file for the first partition. Type: FAT32.
- Select the ISO file for the second partition. Type: ISO9660.
- Click the MAP button.
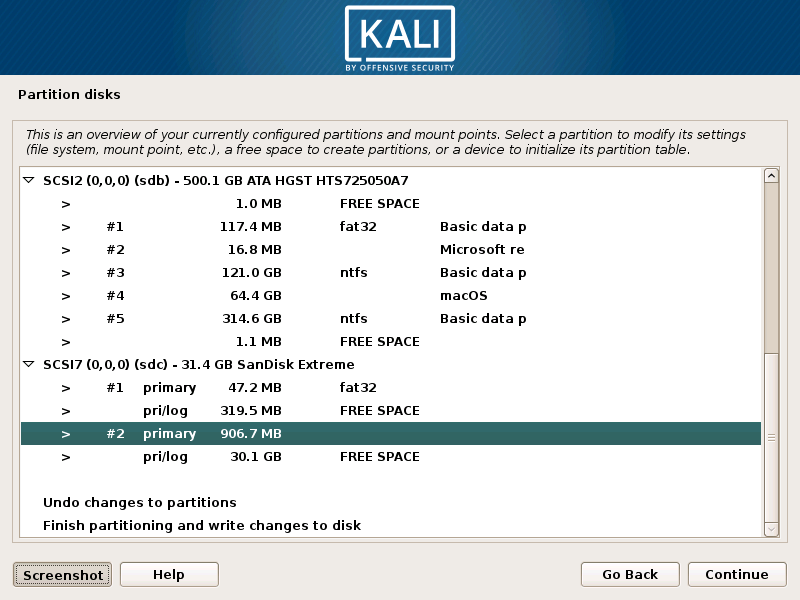
You should see a new partition, now you can boot USB to install Kali Linux.
- From the Grub2 menu, select the PartIMG Partition menu or press the k key. You will see a list of Grub2 configuration files (grub.cfg) or/and Syslinux (isolinux.cfg/syslinux.cfg) as shown below.
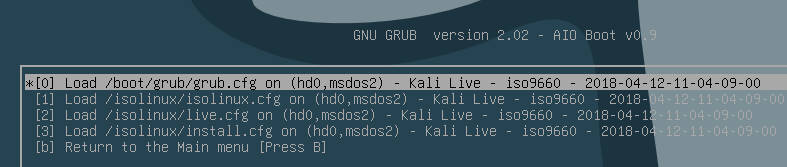
- Now select any configuration file on iso9660 partition, you should choose grub.cfg (if any).
After you have installed Kali Linux, you can restore the AIO Boot drive as before clicking the MAP button. Run PartIMGMapper.exe, click the UNMAP button and select the .MBR file that was previously backed up by this tool. This file is in the same folder as the PartIMGMapper.exe file. That’s it, there will not be any data on your USB lost.
For other Linux distributions, if it is not supported through AIOCreator.exe, you can try the same steps above. Good luck!