
Secure Boot is designed to prevent non-Windows OS from booting. However, you can still boot Grub2 with Secure Boot using Shim and MOK Manager. And from Grub2, you can boot into other operating systems.
Introduction
18.01.2023:
- The shimx64.efi file included with AIO Boot is no longer valid. This article is only valid for AIO Boot NewGen version.
- VirtualBox version 7.0 has the option to enable Secure Boot. Tested with AIO Boot NewGen version, it works fine.
It does not work on all machines, and we can not chainload to .EFI files if it has not been signed (eg, rEFInd, Clover). You also need to perform additional steps on the MOK Manager. So the best way is to disable Secure Boot.
AIO Boot uses Shim (bootx64.efi is renamed from shimx64.efi) to boot at the first stage. Then Shim will load Grub2 (grubx64.efi) in the second stage. You can find lots of useful information about Secure Boot on Ubuntu and rEFInd.
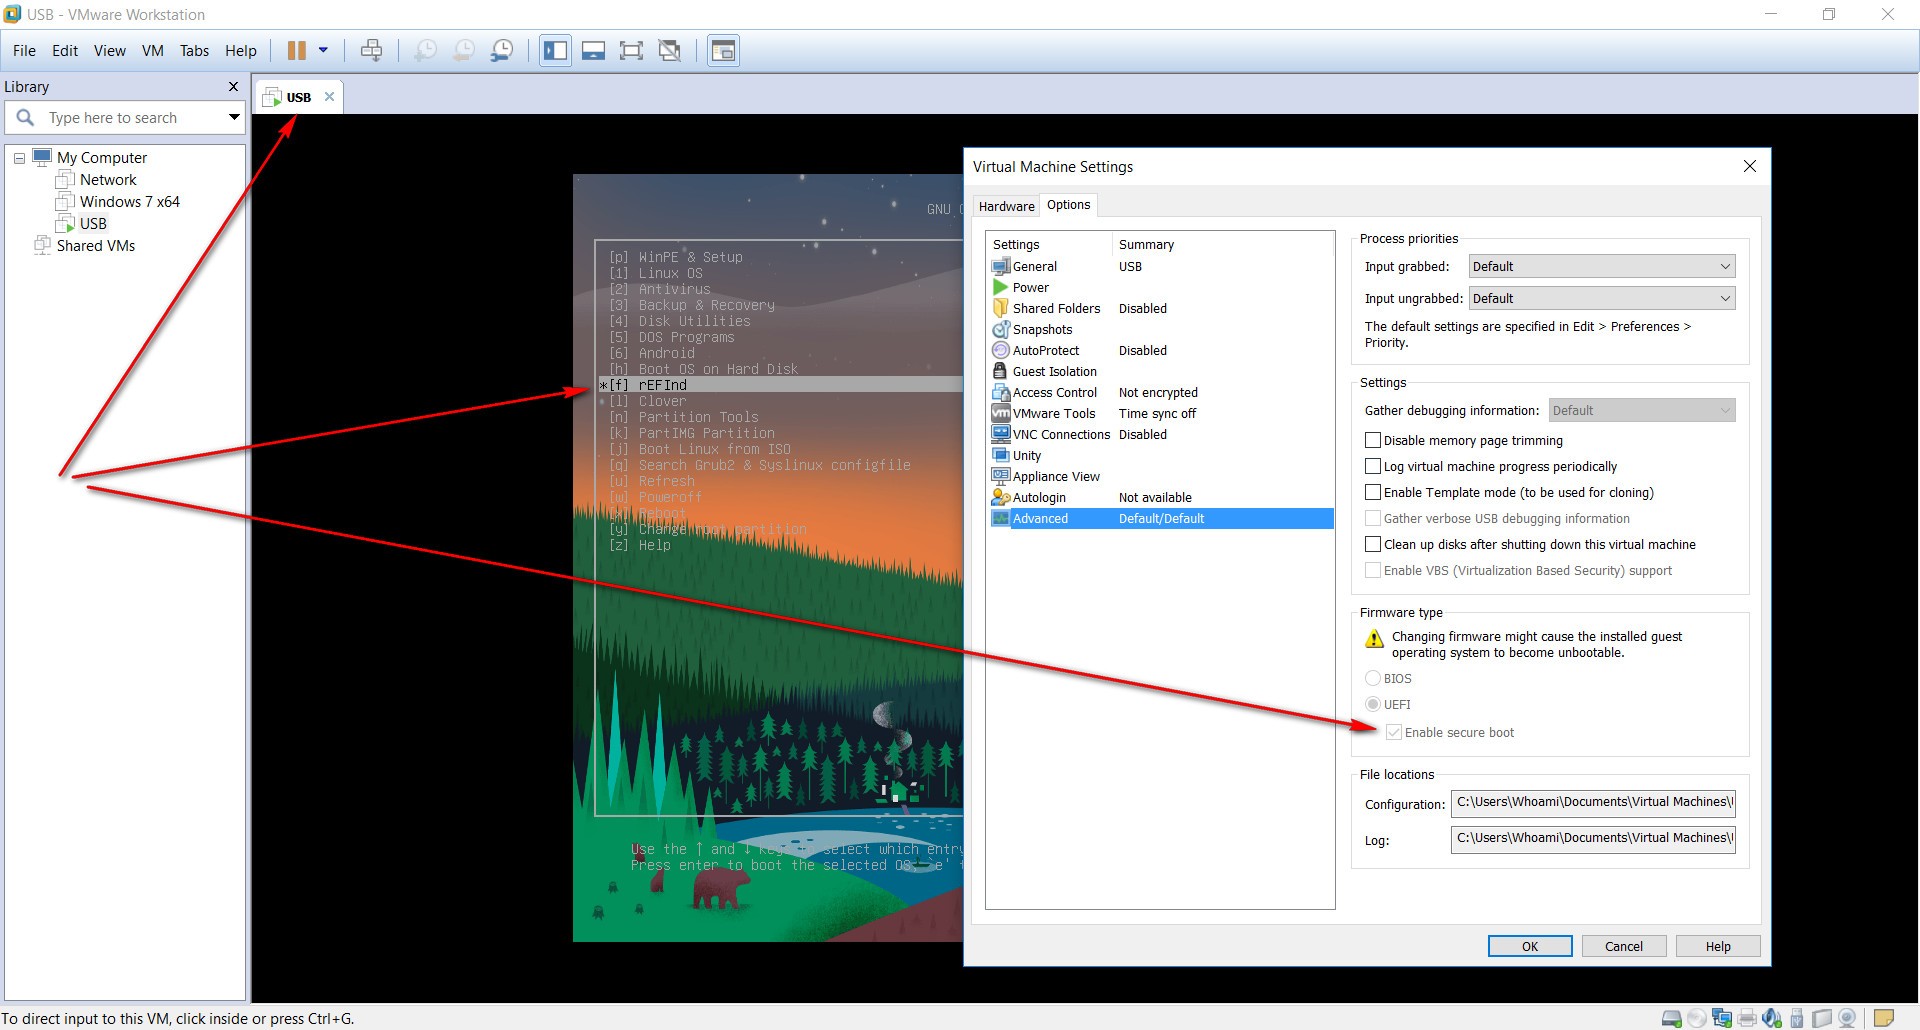
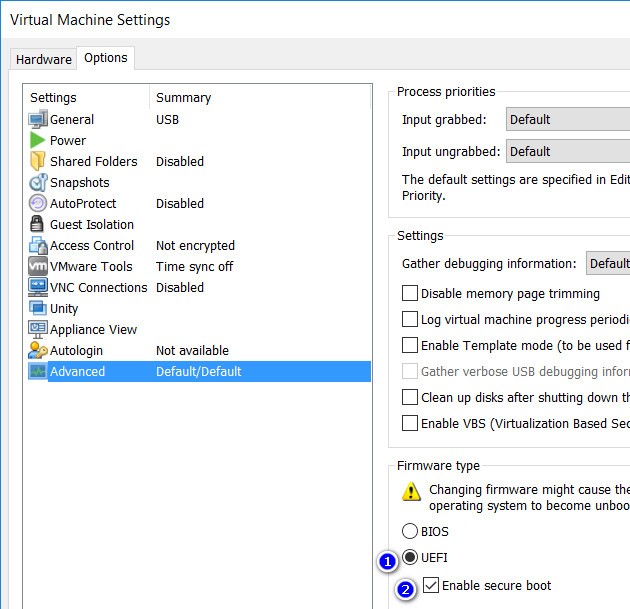
If your computer does not have Secure Boot, you can boot from USB in VMware Workstation. Just enable UEFI mode and select Enable secure boot. Then boot Grub2 with Secure Boot using Shim and MOK Manager through the steps below.
Boot Grub2 with Secure Boot
You only need to do the steps below once.
The steps below are one of two ways, in step 3, Enroll key from disk should now be selected instead of Enroll hash from disk. The next steps choose the file /EFI/ENROLL_THIS_KEY_IN_MOKMANAGER.cer instead of the file grubx64.efi.
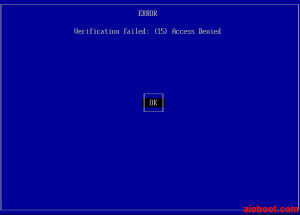
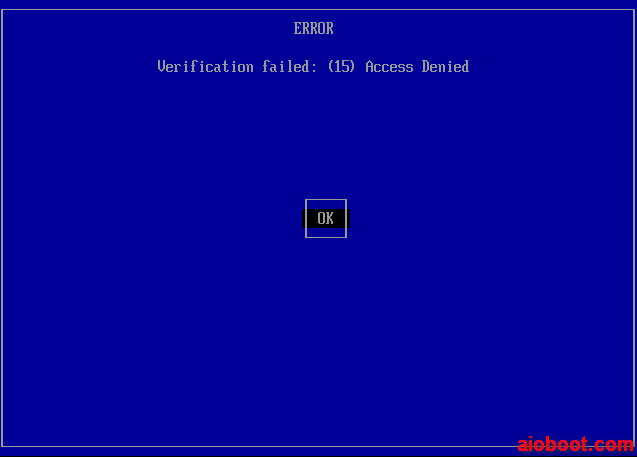
- You will see a blue screen with the following messages: ERROR – Verification failed: (15) Access Denied!. Press Enter to continue.
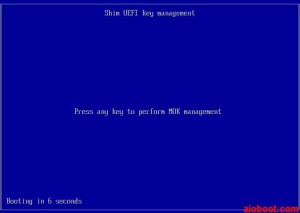
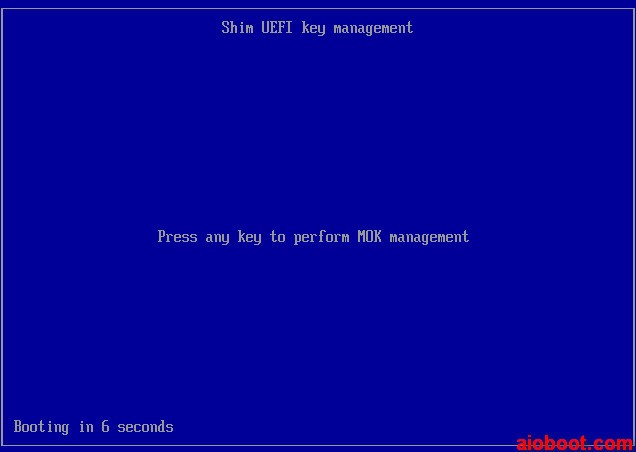
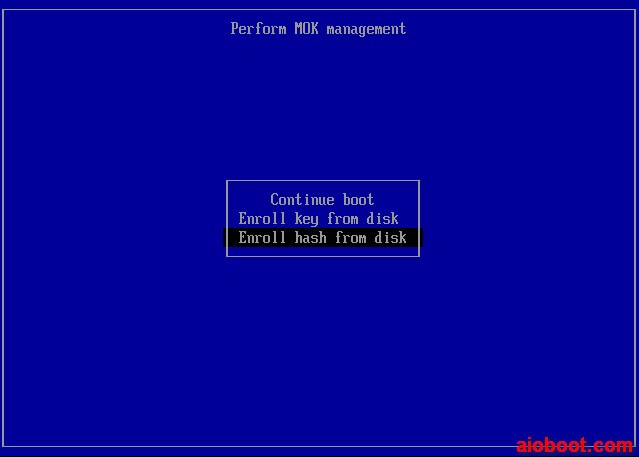
- In the Shim UEFI key management screen, press any key to perform MOK management.
- Perform MOK management: choose Enroll hash from disk, press Enter to continue.
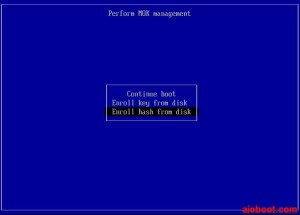
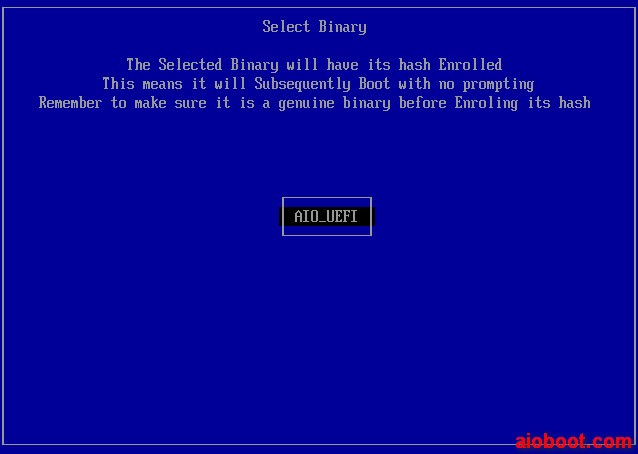
- You will see the partitions in the next Select Binary screen. Select a partition of the AIO Boot, which contains the file /EFI/BOOT/grubx64.efi and /EFI/BOOT/bootx64.efi.

- Hit Enter and go to the path containing the file grubx64.efi. Select grubx64.efi in the list and press Enter to continue.

- [Enroll MOK]: Continue.
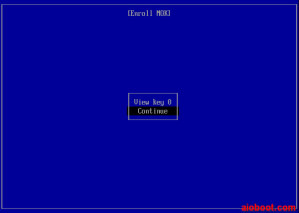
- Enroll the key(s)? Yes.

- Ok you will now return to the Perform MOK management screen in step 3.
- Select Reboot to reboot the system.


Limitation
You can not load the module after booting into Grub2, error given: error: Secure Boot forbids loading module from (hd1)/boot/grub. AIO Boot has embedded all necessary modules into grubx64.efi, these modules have been preloaded.
You can not chainload .EFI files that have not been signed. Clover and rEFInd have not been signed and it will not be able to boot from Grub2. Error given: error: cannot load image.
You should disable Secure Boot so that AIO Boot can work as expected. Finally leave a comment to let me know that it works on your computer.
Hello, my aioboot, and recognized as “linpus lite” in several modern notebooks that do not have bios inherited CSM, only UEFI
can someone help me, when i start windows the screen appears, i press between and start windows normally, how can i ta removing this screen?
Hi Tu. Thanks for AIO Boot!
I was able to successfully get UEFI to work with AIO Boot with the process you listed above. However I would like to remove those changes. How can I do that?
Actually I don’t have a computer that supports Secure Boot for testing.
But I think you can delete its key in the BIOS.
Sounds good. In fact I’ve already deleted the secure boot keys from within the BIOS, however when I try to test AIO Boot again by attempting to boot via UEFI, it continues to work.
If I deleted the keys from BIOS, why would it continue to boot under UEFI?
Hope you don’t mind the questions, I appreciate any insight.
Quick update – I think I managed to solve the problem. Within the BIOS/UEFI I had done all of the following multiple times: deleted the keys, cleared the CMOS, reloaded the keys, and resetup the BIOS/UEFI, however the drive still behaved differently than I thought it would. My last step was to reflash the BIOS/UEFI, and that thankfully that got the drive behaving like I thought it should (as if I had never enrolled keys/hashes). I’m wondering if this is a sign of the UEFI implementation on my motherboard is buggy, or if my understanding of what happened during the key/hash enrollment is lacking? Will test again more later.
Thanks for the useful information. I think you should ask these questions to SHIM and MOK Management developers.
This function works very well, my friend! Do I need to select the files in order? First “bootx64.efi”? Second “bootx64.efi”? Or does the order matter? Thank you!
after in step 3, i cannot continue to step 4, i don’t know why, it happen in my laptop lenovo g40-80.
Thank you, it does not work on all systems.
It doesn’t work on my laptop, i think there are a few steps missing.
The client can’t find bootx64.efi and then grubx64.efi. It’s looking in AIO folder and actually i only can find them in EFI folder. Can you tell me what am i doing wrong?
I don’t know. The first is /EFI/BOOT/grubx64.efi and then /EFI/BOOT/bootx64.efi.
Nicest!!!!!
Work great with Surface Pro 3 and Razer Blade Stealth 2017… ?
Can you boot into Linux or Windows?
Surface Pro 3 and Razer, tested with Windows 8.1, 10 (install), WinPE Gandalf, Ubuntu, ElementaryOS, MX. All in x64.
All Ok !
Thanks, I’m glad about that.
Thanks for your feedback about Surface Pro 3, much appreciated